From Rags to Riches: A Cinderella Story
- Caroline Sturman
- Jun 18, 2016
- 4 min read
Background:
We’re just going to go right in to the location for this one. I found this sorrow-ridden piece on the curbside in a neighborhood in Ohio. Ohio?? Don’t you live in Virginia?? We visit family in Ohio every Thanksgiving and one of their neighbors was giving up on this piece and had dragged it to the side of the road for trash pick-up. I don’t blame them. It was beaten up pretty badly and several coats of paint told you that they tried fixing it up in the past. Needless to say, I scooped this puppy up and took it home!
Purpose:
I wanted to turn this into a cutesy vanity desk for my two nieces, Sophie and Lucy. Are they teenagers and would use this vanity now? Of course not! They are almost two and four so they have a ways to go before using this for its intended purpose, but who cares! I love working on pieces for other people, especially my loved ones. <3
Why so tricky? Before I completely bash this piece, I’d like to say that since its solid wood, it is structurally sound and doesn’t show any signs of water damage. *clears throat* This thing was filthy!! And it was chipping all over the place! I also had some bleed-through issues and it just was a hot mess. There was also some green gunk in one of the drawers that had some soap-like qualities, so that was fun to clean out.
1. Scrub Down. I went over the piece with a damp (maybe a little wetter than damp) cloth and then immediately went over it with a dry cloth. This included the removal and wipe-down of drawers, and a good wipe-down of all the crevices inside and underneath the piece. Did I mention there were spider egg sacs in this piece? Nothing live came crawling out so there’s a positive!
2. Sand like Crazy. Thank goodness I have an electric sander because this piece needed it! 80-grit all the way! I also did some sanding by hand to get the really stubborn spots. Wait, I thought you didn’t have to sand before using AS Paint? It’s crucial that all the chipped paint be removed because it could cause your new coat of paint to chip. Also, because this piece had layers of paint on it that wasn't too evenly applied and I wanted this piece to look very clean and modern when finished. By “clean,” I mean non-distressed, so I had to remove a lot of the bumpiness of the piece so it would look smooth when finished.
3. First Coats of Paint. For this piece, I used AS Old White for my first coat all over, including the top and the insides of the drawers. I think I did 2 or 3 coats of AS Old White before I could no longer see any underlying paint. On some of the drawers, some red was coming through the paint (this can happen, don’t panic!) so I just put some Shellac over these areas and repainted. Some of the chipped areas were still showing up so yes, I re-sanded some and then repainted. You can see my tools below....wood filler to fill in any holes or deep dents, putty knife to smooth out wood filler, crappy paint brush (used the end to get the wood filler out), and sandpaper to sand down the wood filler and any chippy areas.
But look how much of a difference two coats of AS Old White made on this drawer!
4. Second Coat of Paint. AS Louis Blue is what I used to paint the top of the vanity desk. By the time I got to this step, all of the re-sanding and repainting was done so there wasn’t much more to it. It was a miracle!
5. Stencil Mania. I don’t always paint the insides of drawers, but when I do, I have to get a little crazier and stencil them! Truth be told, I tried using two different kinds of contact paper to line the inside of the drawers, but neither one stuck! I tried roughing up the wood, but my efforts were futile. I needed a design on the inside, so I was left to stencil.
6. Hardware change. The one thing I disliked most about this piece was its bulky knobs. No bueno! So I ordered some new ones off Etsy for the side drawers and found a nice circle one for the center drawer from Home Depot. They match the paint perfectly! Why thank you, it’s called I painted them. That’s right, folks, you can use AS Paint to paint hardware!! And you can seal your painted hardware with AS Clear Wax as well. Craziness!
7. Clear wax & Polycrylic. I used AS Clear Wax everywhere except on the insides of the drawers. I used Polycrylic on the inside of the drawers just because they’ll get more wear than the rest of the piece and if the color is a little off, no one would really notice. I put three coats of wax on the top of the piece, two on the front side, and one over everywhere else.
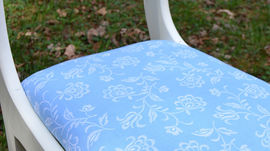
This piece was paired with a chair I refurbished to make a cute little place for my nieces to do their hair and put on their makeup in the future. To read up on how I refurbished the chair, click here!


Comments